
|
|
#1 |
|
Участник
|
stoneridgesoftware: How to Set Up an Entity Through Portal Security in Dynamics 365 CRM
Источник: https://stoneridgesoftware.com/how-t...amics-365-crm/
============== Below are the steps for how to set up an entity through portal security in Dynamics 365 CRM to be used by the Liquid Template. Setting up an Entity is a two-step process Step 1 – Entity permissions: Set up the Entity Permissions for the entity we would like to retrieve. In this example, I will be using a custom entity that I created. Go to Portals> Entity Permissions  This will show you a list of the entity permissions that exist for the system. 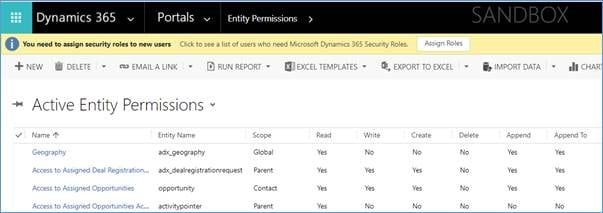 You can check to see if the entity is already listed here but since I am using a custom entity that I just created I know that the entity isn’t here. At this point, I click on the new button to create a new entity permission. Below you can see the form that I filled out to create permissions for the custom entity called “designleadtime”. 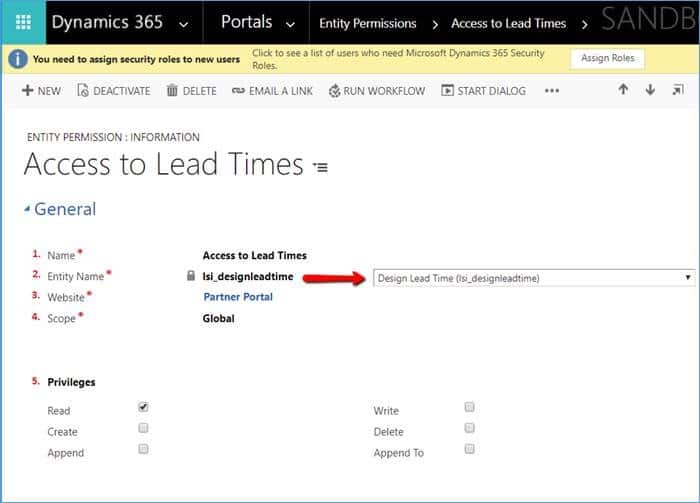 Fields Explained:
b. Contact: Grant privileges to the entity record that has a direct relationship to an owner (contact). c. Account: Grant privileges to the entity record that has a relationship to an account, which serves as the owner, assuming the account is the parent customer of the contact. d. Parent: Grant privileges to the entity record through the chain of its parent permissions’ relationships. e. Self: Grant the rights a user has to their own Contact (Identity) record. This allows users to use Entity Forms or Web Forms to make changes to their own Contact Record linked with their profile. 5. Permissions – use the checkboxes to grant the permissions that you would like to grant access to through the portal. In my liquid example, we only want to retrieve this data but we don’t want to allow anyone from the portal to change it in any way so I only grant “Read” access. You will need to allow read access to retrieve any entity from Liquid FetchXML. SAVE the Entity Permission Step 2 – Web role: Once the entity permission is saved. Select the Web Role that should have access to this permission. If we scroll down on our Entity Permission form. We will need to grant that permission to a web role. 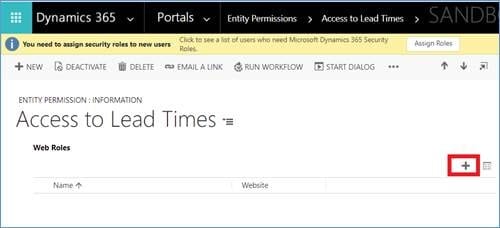 On our new Entity Permission, we will see that no Web Roles have been selected. We just need to click on the add button that I have highlighted and select the Web Role that we would like to grant this permission to. Because we are focused on our Fetch from Liquid we would more than likely want to grant this permission to any portal “Authenticated User” as I have selected below. 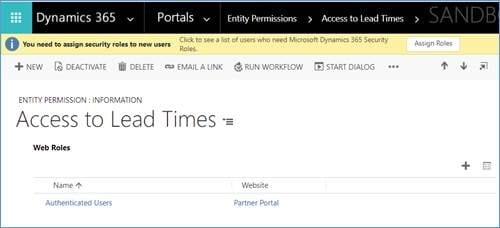 At this point, we should have permissions set for our customer “Design Lead Time” entity and it should be accessible to our Liquid FetchXML query. Example: From a tab in a browser that is authenticated to the portal. 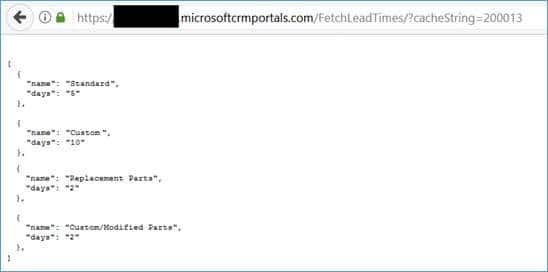 Источник: https://stoneridgesoftware.com/how-t...amics-365-crm/
__________________
Расскажите о новых и интересных блогах по Microsoft Dynamics, напишите личное сообщение администратору. |
|
|
|
|
|